> ## Documentation Index
> Fetch the complete documentation index at: https://tomee-mintlify-5be20102.mintlify.site/llms.txt
> Use this file to discover all available pages before exploring further.
# GitHub
> Connect your GitHub repository to Mintlify for automated deployments, pull request preview builds, and continuous documentation synchronization.
Mintlify uses a GitHub App to automatically sync your documentation with your GitHub repository.
**Do you need the GitHub App?**
* **Mintlify-hosted repository** in the `mintlify-community` organization: No. The GitHub App is already configured.
* **Your own repository**: Yes. Install the GitHub App to enable automatic deployments when you push changes.
See your repository in the [Git Settings](https://app.mintlify.com/settings/deployment/git-settings) page of your dashboard.
If your repository is in a private repository owned by the Mintlify organization, the GitHub App is automatically configured and managed by Mintlify. You can use the web editor to make changes to your documentation. If you want to work on your documentation locally, clone the repository to your own organization and update your Git settings to use your own repository.
## Clone to your own repository
If you skipped connecting your own Git repository during onboarding, your documentation lives in a private repository owned by the Mintlify organization. To move it to your own account or organization, go to [Git Settings](https://app.mintlify.com/settings/deployment/git-settings) in your dashboard. A setup wizard guides you through the process with two options:
The clone option automatically creates a copy of your documentation in your GitHub account.
1. Select **GitHub** as your provider.
2. Click **Clone**.
3. Authorize with GitHub when prompted.
4. Select the GitHub organization where you want to create the repository.
5. Confirm the clone. Mintlify copies your documentation files into a new repository.
6. Optionally install the Mintlify GitHub App for automatic deployments.
This process permanently deletes your content from the Mintlify-hosted repository.
Download your documentation from the setup wizard before completing the manual setup process.
If you prefer to set up your repository manually:
1. Download your documentation as a zip file so that you have a backup of your files.
2. Select **GitHub** as your provider.
3. Click **Continue setup**.
4. Authorize with GitHub when prompted.
5. Select your organization, repository, and branch.
6. Optionally specify a subdirectory if your docs are not at the repository root.
7. Save your settings.
After completing either path, install the GitHub app by following the steps in [Install the GitHub app](#install-the-github-app).
## Install the GitHub app
You must have organization ownership or administrator permissions in a repository to install the app. If you lack the necessary permissions, the repository owner must approve the installation request.
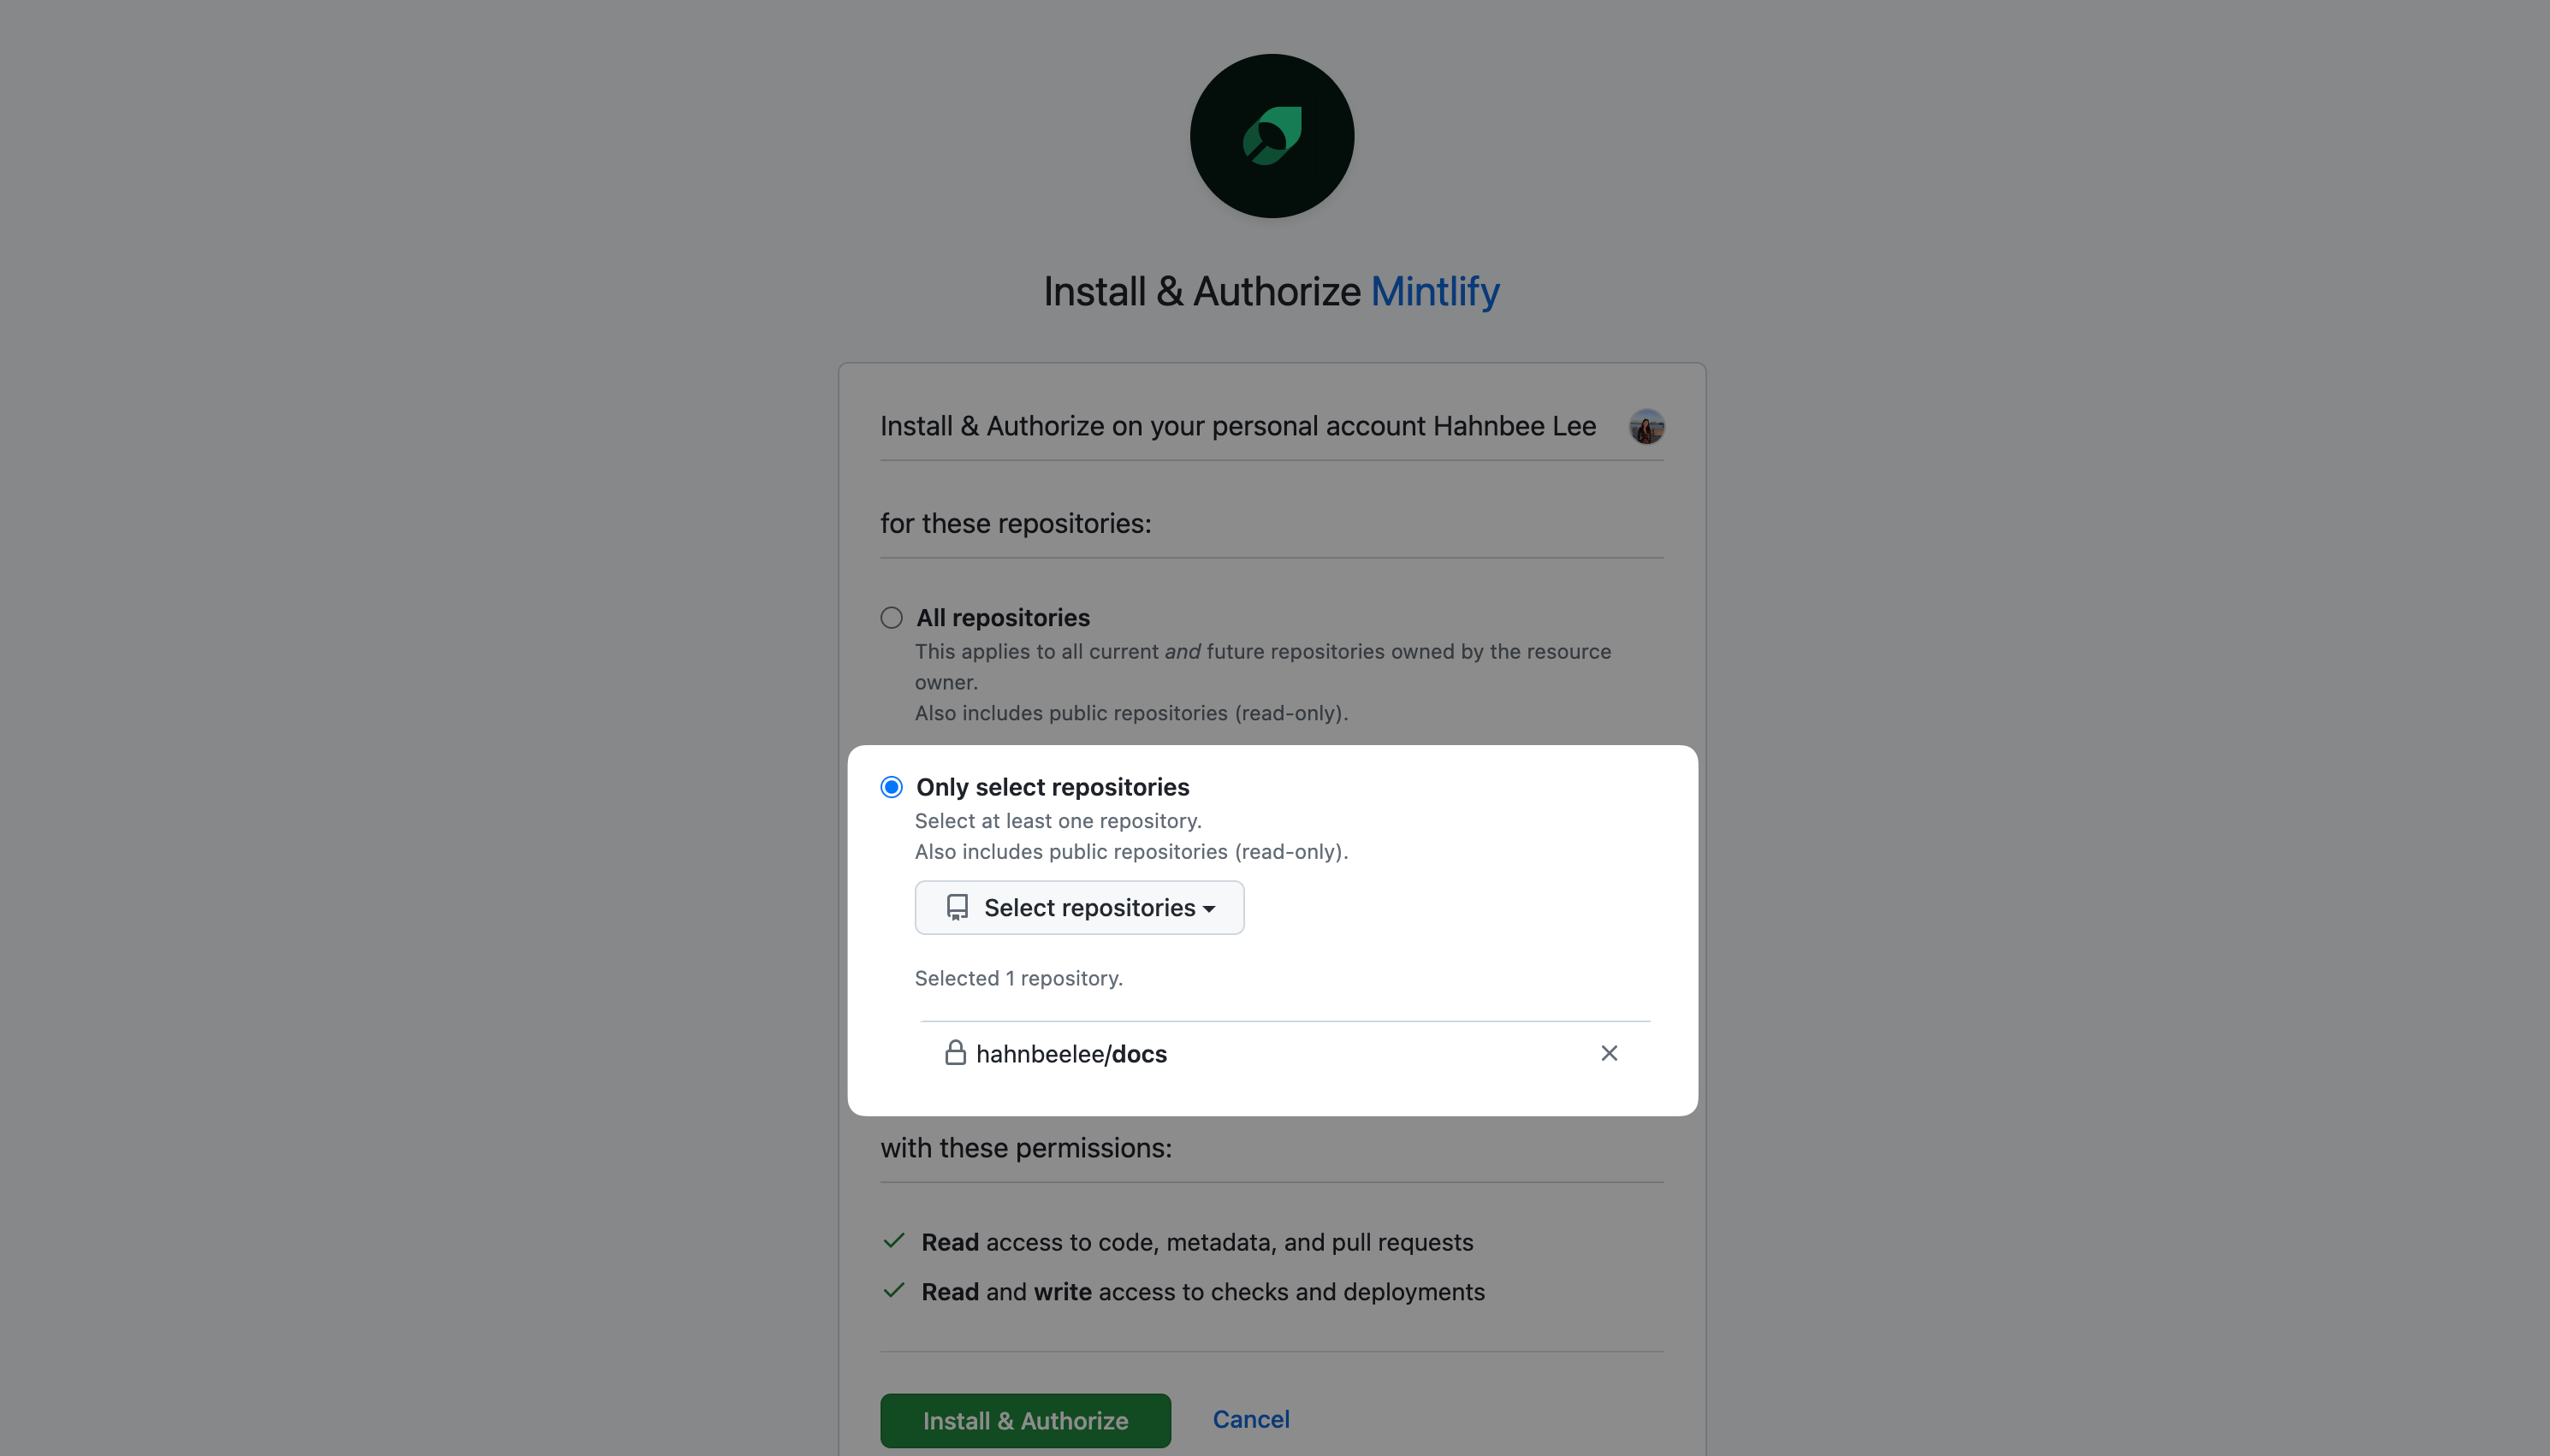
Install the Mintlify GitHub App through your [dashboard](https://app.mintlify.com/settings/organization/github-app).
 ## Permissions
When you install the GitHub App, grant the following permissions.
Read permissions:
* `metadata`: Basic repository information
Read and write permissions:
* `checks`: Create status checks on pull requests
* `code`: Read file changes when you commit to your docs branch
* `deployments`: Generate preview deployments for pull requests
* `pull requests`: Create branches and pull requests from the web editor
The app only accesses repositories that you explicitly grant it access to. If you have branch protection rules enabled, the app can't push directly to protected branches.
## Manage repository access
When installing the GitHub App, you can grant access to all of your repositories or specific ones. Grant access only to your documentation repository and any repositories that you want to provide as context for the agent or workflows. You can modify this selection anytime in your [GitHub App settings](https://github.com/apps/mintlify/installations/new).
## Configure docs source
Change the organization, repository, or branch that your documentation builds from in the [Git Settings](https://app.mintlify.com/settings/deployment/git-settings) section of your dashboard.
Connecting a new Git repository replaces your Mintlify-hosted content with the contents of the repository that you select. If you connect an empty or unrelated repository, your previous documentation files are no longer accessible from the web editor.
Before you change your Git settings, download a zip of your documentation from the setup wizard so that you have a backup. If you only want to explore the Git Settings page, do not select a repository or save any configuration.
## GitHub Enterprise with IP allowlists
If your GitHub Enterprise Cloud organization has an IP allowlist enabled, you need to add Mintlify's egress IP address (`54.242.90.151`) to your allowlist for the GitHub App to function properly.
Follow [GitHub's documentation](https://docs.github.com/en/enterprise-cloud@latest/organizations/keeping-your-organization-secure/managing-security-settings-for-your-organization/managing-allowed-ip-addresses-for-your-organization) to configure your IP allowlist.
## Troubleshooting
### Deployment not triggering automatically
If pushes to your repository don't trigger deployments, check the following possible problems.
Check that the correct repository has the app installed.
1. Go to [GitHub App settings](https://app.mintlify.com/settings/organization/github-app) in your dashboard.
2. Check that your repository is on the active app installations list.
Ensure that you're pushing to the correct branch.
1. Go to [Git Settings](https://app.mintlify.com/settings/deployment/git-settings)
2. Verify the branch in your dashboard matches the branch that you're pushing to.
### GitHub app connection issues
If you encounter problems with the GitHub app, resetting the connection resolves most problems. Common symptoms include the web editor showing **GitHub App Installation Required**, the dashboard being unable to list your repositories, or GitHub OAuth only requesting the `public_repo` scope so that your private repositories are not selectable.
Complete all four steps in order. Skipping the uninstall or revoke step leaves stale credentials that cause the reinstall to fail silently.
Go to [GitHub App installations](https://github.com/settings/installations), find **Mintlify**, click **Configure**, scroll to the bottom, and click **Uninstall**.
Go to [Authorized GitHub Apps](https://github.com/settings/applications), find **Mintlify** under **Authorized GitHub Apps**, and click **Revoke**.
In your Mintlify dashboard, go to [Git Settings](https://app.mintlify.com/settings/deployment/git-settings), install the GitHub app, select your GitHub organization or account, and grant access to your docs repository.
Go to [account settings](https://app.mintlify.com/settings/account) and click **Authorize GitHub account** to complete the authorization. This step re-issues the OAuth token with the correct scopes for both public and private repositories.
### Editor shows "GitHub App Installation Required"
If the web editor shows **GitHub App Installation Required** after you opened Git Settings or connected a repository, the dashboard is expecting a GitHub-backed source that is not fully connected.
* If you opened Git Settings without selecting a repository or saving, your Mintlify-hosted content is still intact. Complete the [GitHub app connection reset](#github-app-connection-issues) to restore access to the editor.
* If you connected a repository, the editor now points at that repository. Reset the connection with the steps above, then reconnect to the correct repository from [Git Settings](https://app.mintlify.com/settings/deployment/git-settings).
### Recover the previous Mintlify-hosted content
If you connected the wrong repository (for example, an empty repository) and your original Mintlify-hosted documentation is no longer visible in the editor, the previous content is not automatically restored when you disconnect. Reach out to [support](mailto:support@mintlify.com) with your deployment name and organization ID. Support can share a zip of your previous Mintlify-hosted repository contents so that you can re-upload them or push them to the correct repository.
To avoid this situation in the future, download a backup zip from the Git Settings setup wizard before you connect any repository.
### Feedback add-ons are unavailable
The edit suggestions and raise issues feedback features are only available for public GitHub repositories. If these options are unavailable in your dashboard, check your repository visibility.
If your repository is public and you cannot enable the edit suggestions or raise issues options in your dashboard, revalidate your Git settings.
Go to [Git Settings](https://app.mintlify.com/settings/deployment/git-settings) in your dashboard.
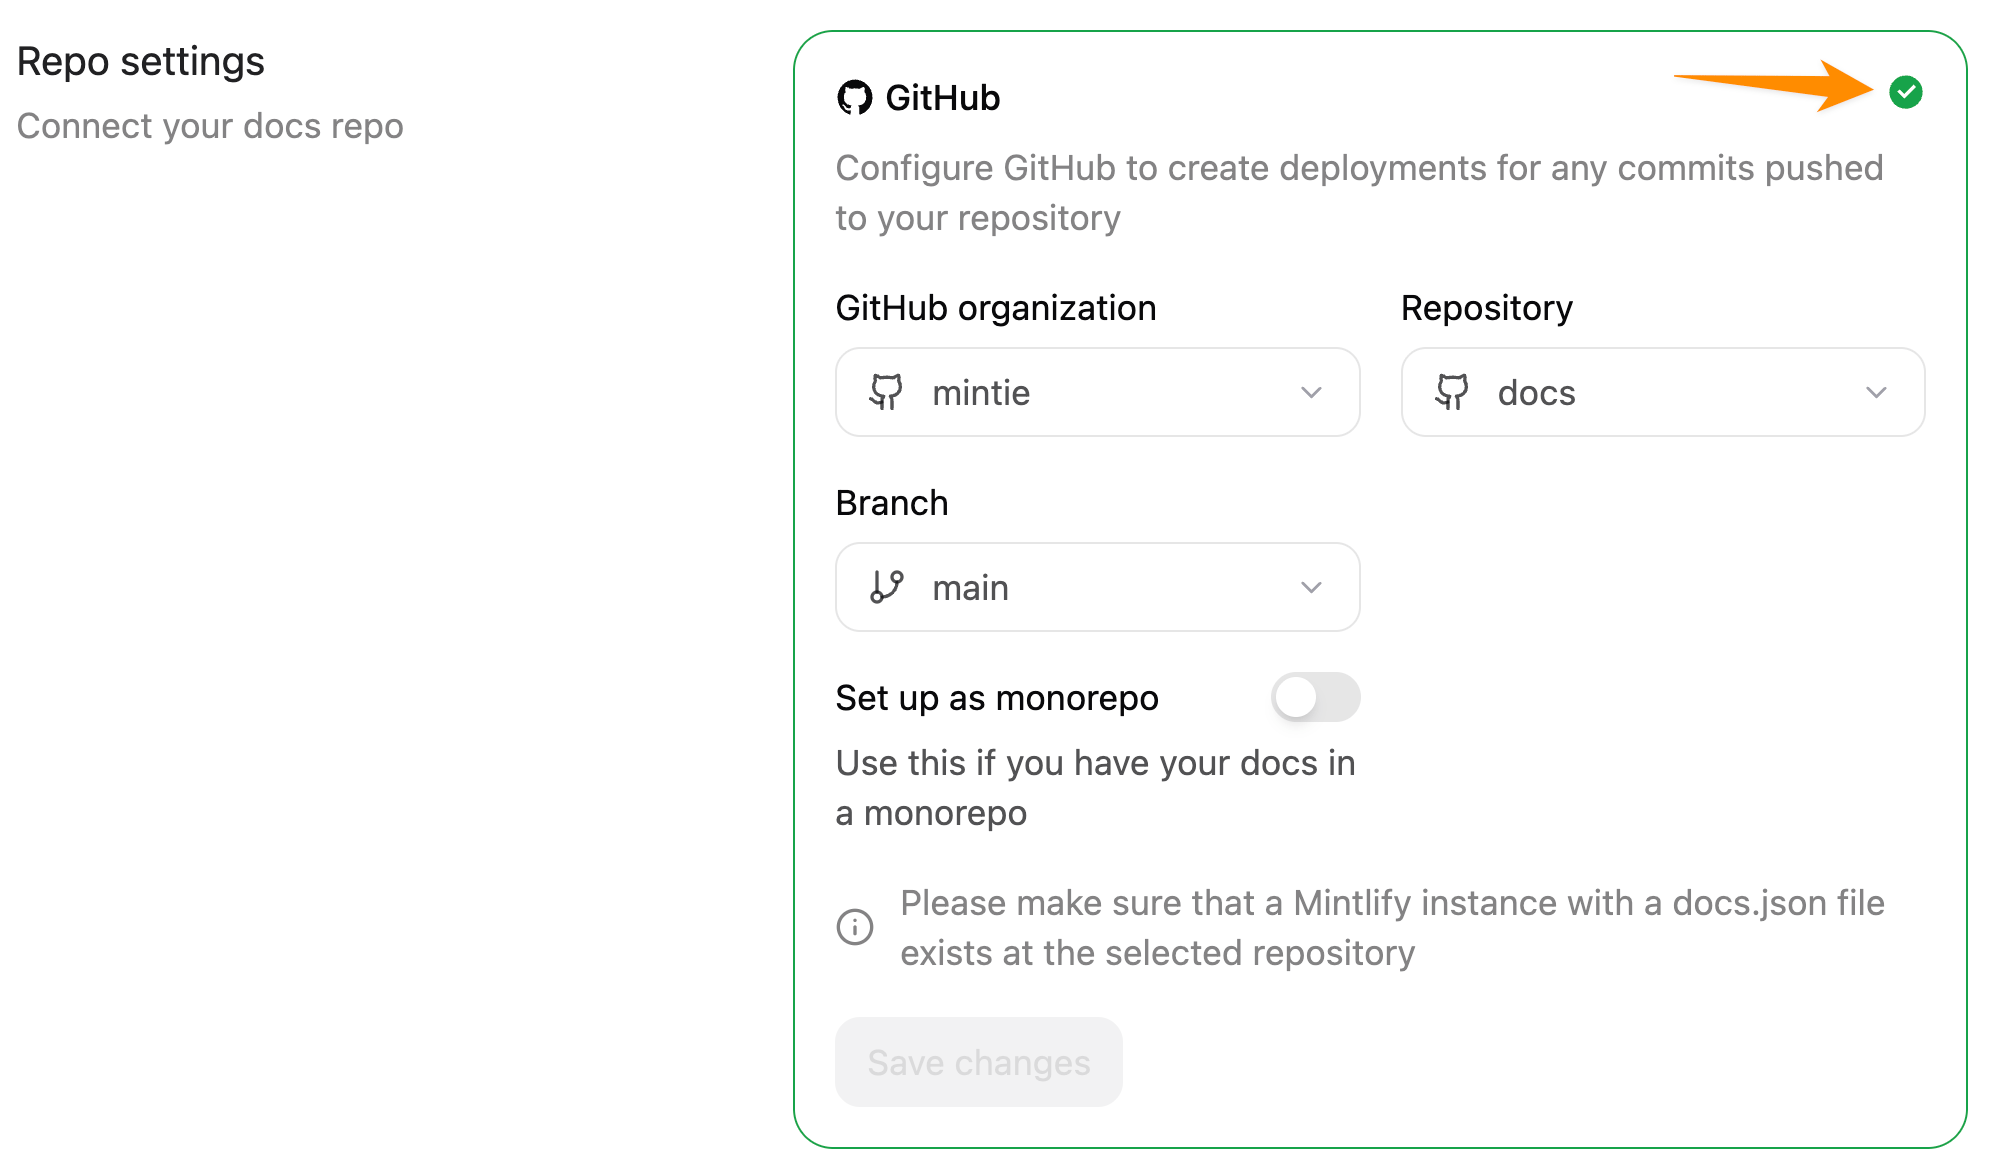
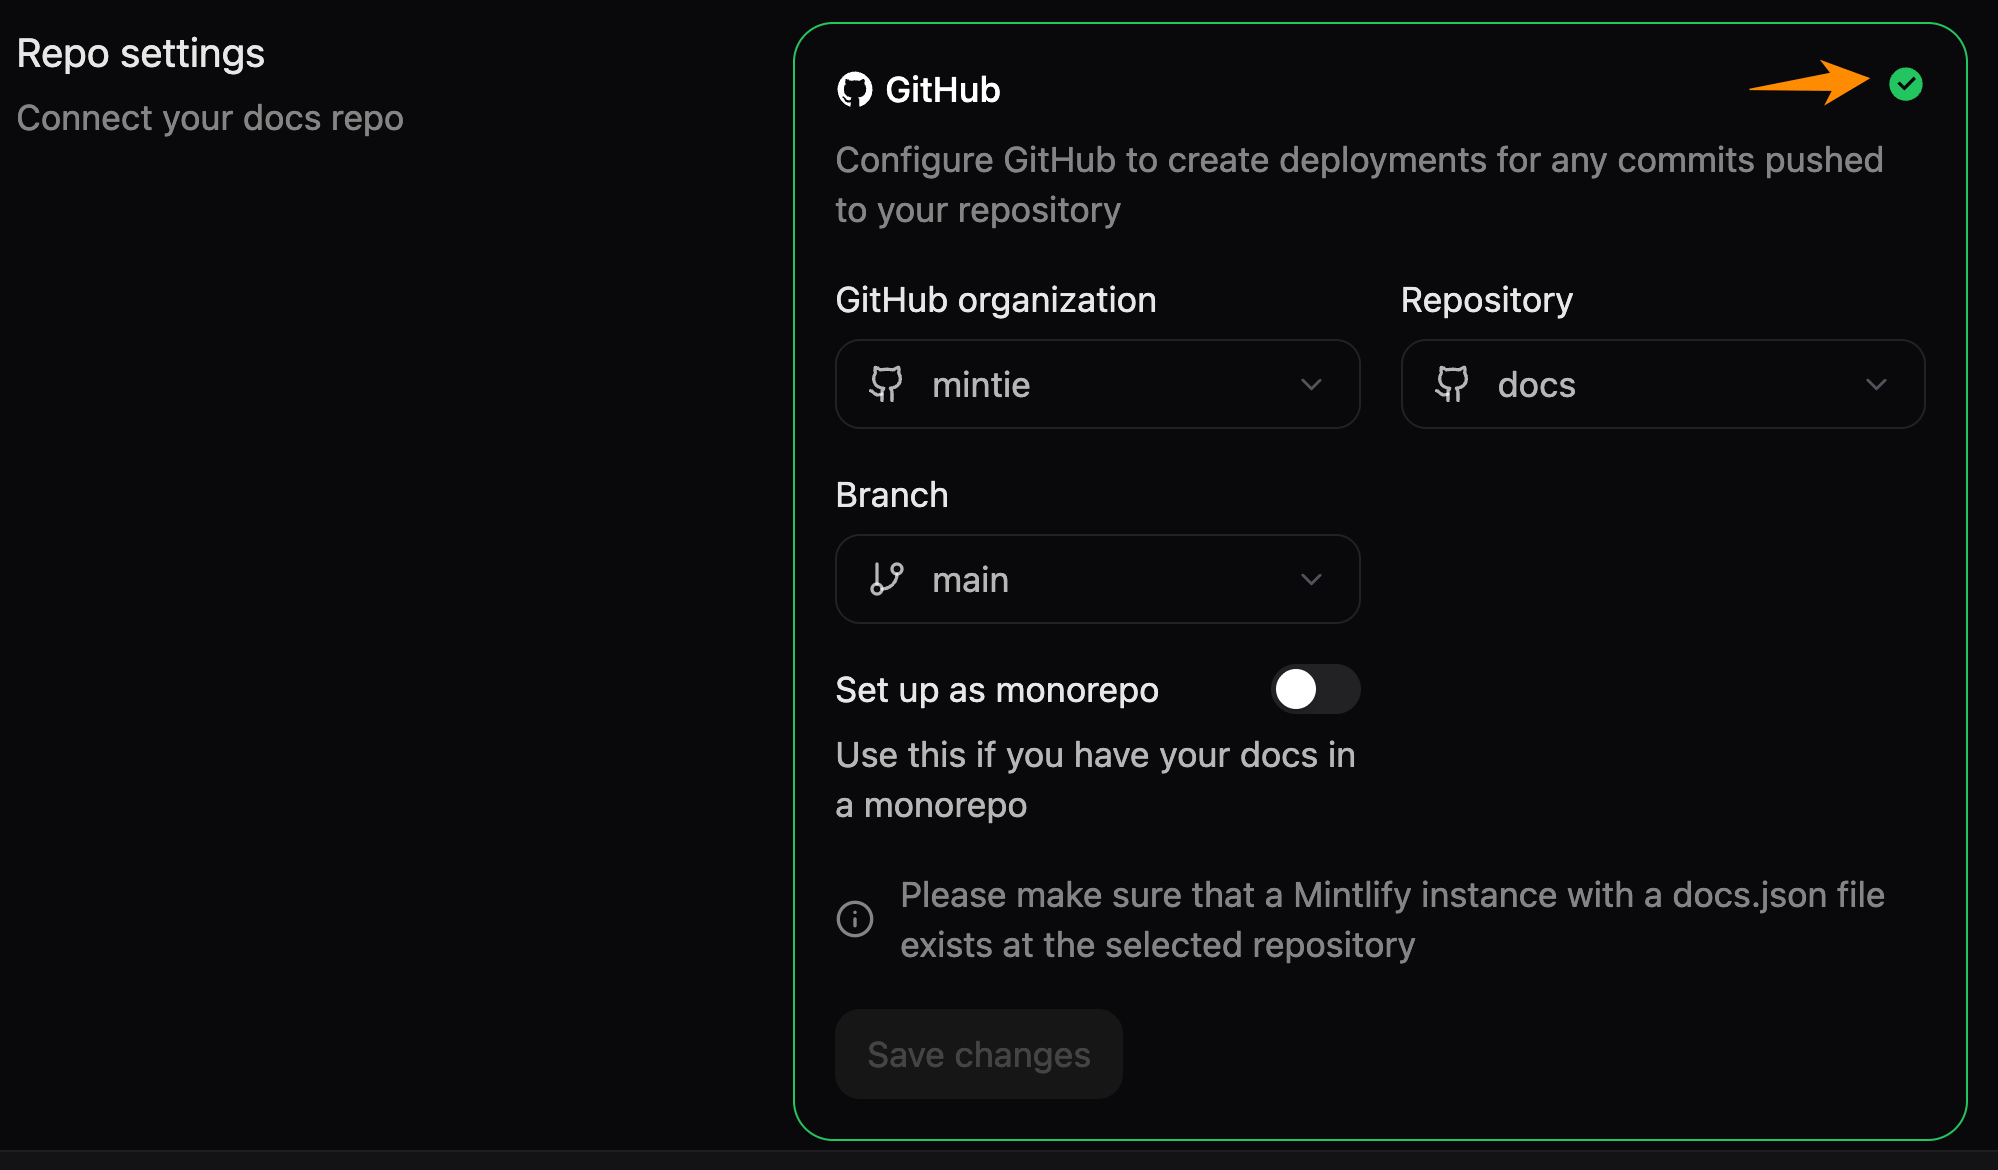
Click the green check mark in the corner of the Git settings box to revalidate your repository settings. This forces an update to your repository settings to reflect whether your repository is public or private.
## Permissions
When you install the GitHub App, grant the following permissions.
Read permissions:
* `metadata`: Basic repository information
Read and write permissions:
* `checks`: Create status checks on pull requests
* `code`: Read file changes when you commit to your docs branch
* `deployments`: Generate preview deployments for pull requests
* `pull requests`: Create branches and pull requests from the web editor
The app only accesses repositories that you explicitly grant it access to. If you have branch protection rules enabled, the app can't push directly to protected branches.
## Manage repository access
When installing the GitHub App, you can grant access to all of your repositories or specific ones. Grant access only to your documentation repository and any repositories that you want to provide as context for the agent or workflows. You can modify this selection anytime in your [GitHub App settings](https://github.com/apps/mintlify/installations/new).
## Configure docs source
Change the organization, repository, or branch that your documentation builds from in the [Git Settings](https://app.mintlify.com/settings/deployment/git-settings) section of your dashboard.
Connecting a new Git repository replaces your Mintlify-hosted content with the contents of the repository that you select. If you connect an empty or unrelated repository, your previous documentation files are no longer accessible from the web editor.
Before you change your Git settings, download a zip of your documentation from the setup wizard so that you have a backup. If you only want to explore the Git Settings page, do not select a repository or save any configuration.
## GitHub Enterprise with IP allowlists
If your GitHub Enterprise Cloud organization has an IP allowlist enabled, you need to add Mintlify's egress IP address (`54.242.90.151`) to your allowlist for the GitHub App to function properly.
Follow [GitHub's documentation](https://docs.github.com/en/enterprise-cloud@latest/organizations/keeping-your-organization-secure/managing-security-settings-for-your-organization/managing-allowed-ip-addresses-for-your-organization) to configure your IP allowlist.
## Troubleshooting
### Deployment not triggering automatically
If pushes to your repository don't trigger deployments, check the following possible problems.
Check that the correct repository has the app installed.
1. Go to [GitHub App settings](https://app.mintlify.com/settings/organization/github-app) in your dashboard.
2. Check that your repository is on the active app installations list.
Ensure that you're pushing to the correct branch.
1. Go to [Git Settings](https://app.mintlify.com/settings/deployment/git-settings)
2. Verify the branch in your dashboard matches the branch that you're pushing to.
### GitHub app connection issues
If you encounter problems with the GitHub app, resetting the connection resolves most problems. Common symptoms include the web editor showing **GitHub App Installation Required**, the dashboard being unable to list your repositories, or GitHub OAuth only requesting the `public_repo` scope so that your private repositories are not selectable.
Complete all four steps in order. Skipping the uninstall or revoke step leaves stale credentials that cause the reinstall to fail silently.
Go to [GitHub App installations](https://github.com/settings/installations), find **Mintlify**, click **Configure**, scroll to the bottom, and click **Uninstall**.
Go to [Authorized GitHub Apps](https://github.com/settings/applications), find **Mintlify** under **Authorized GitHub Apps**, and click **Revoke**.
In your Mintlify dashboard, go to [Git Settings](https://app.mintlify.com/settings/deployment/git-settings), install the GitHub app, select your GitHub organization or account, and grant access to your docs repository.
Go to [account settings](https://app.mintlify.com/settings/account) and click **Authorize GitHub account** to complete the authorization. This step re-issues the OAuth token with the correct scopes for both public and private repositories.
### Editor shows "GitHub App Installation Required"
If the web editor shows **GitHub App Installation Required** after you opened Git Settings or connected a repository, the dashboard is expecting a GitHub-backed source that is not fully connected.
* If you opened Git Settings without selecting a repository or saving, your Mintlify-hosted content is still intact. Complete the [GitHub app connection reset](#github-app-connection-issues) to restore access to the editor.
* If you connected a repository, the editor now points at that repository. Reset the connection with the steps above, then reconnect to the correct repository from [Git Settings](https://app.mintlify.com/settings/deployment/git-settings).
### Recover the previous Mintlify-hosted content
If you connected the wrong repository (for example, an empty repository) and your original Mintlify-hosted documentation is no longer visible in the editor, the previous content is not automatically restored when you disconnect. Reach out to [support](mailto:support@mintlify.com) with your deployment name and organization ID. Support can share a zip of your previous Mintlify-hosted repository contents so that you can re-upload them or push them to the correct repository.
To avoid this situation in the future, download a backup zip from the Git Settings setup wizard before you connect any repository.
### Feedback add-ons are unavailable
The edit suggestions and raise issues feedback features are only available for public GitHub repositories. If these options are unavailable in your dashboard, check your repository visibility.
If your repository is public and you cannot enable the edit suggestions or raise issues options in your dashboard, revalidate your Git settings.
Go to [Git Settings](https://app.mintlify.com/settings/deployment/git-settings) in your dashboard.
Click the green check mark in the corner of the Git settings box to revalidate your repository settings. This forces an update to your repository settings to reflect whether your repository is public or private.